A Comprehensive Guide to Composite Decking and Trim Boards Installation
Introduction
Composite decking and trim boards have gained significant popularity in recent years due to their durability, low maintenance requirements, and aesthetic appeal. Unlike traditional wood decks that require regular staining and painting, composite materials are designed to resist fading, warping, and insect damage. This guide aims to provide you with a step-by-step process for installing composite decking and trim boards, ensuring a professional and long-lasting result.
Necessary Tools for Composite Decking and Trim Boards Installation
To successfully install composite decking and trim boards, you will need the following tools:
- Power Drill
- Screwdriver
- Circular Saw or Jigsaw
- Tape Measure
- Level
- Chalk Line
- Deck Screws
- Composite Decking Fasteners (such as hidden fasteners or screws)
Ensure all tools are in good working condition before starting your project. Proper tools can make the job easier and reduce the risk of mistakes.
Proper Installation Techniques
The installation process of composite decking and trim boards involves several key steps. Here’s a detailed guide:
Step 1: Planning and Preparation
Before beginning, carefully plan your deck layout and gather all necessary materials. Ensure that the area where the deck will be installed is level and free from debris. Check local building codes and obtain any required permits.
Step 2: Installing the Frame
The frame serves as the foundation of your deck. It should be constructed using pressure-treated lumber or other suitable materials. Secure the posts and beams, ensuring they are level and properly spaced according to your design. Use appropriate hardware such as post bases and joist hangers to attach the framing members securely.
Step 3: Installing the Decking Boards
Start by laying out your composite decking boards on top of the frame. Leave a small gap between each board to allow for expansion and contraction due to temperature changes. Attach the boards using composite deck screws or hidden fasteners. Ensure the boards are aligned properly and securely fastened.
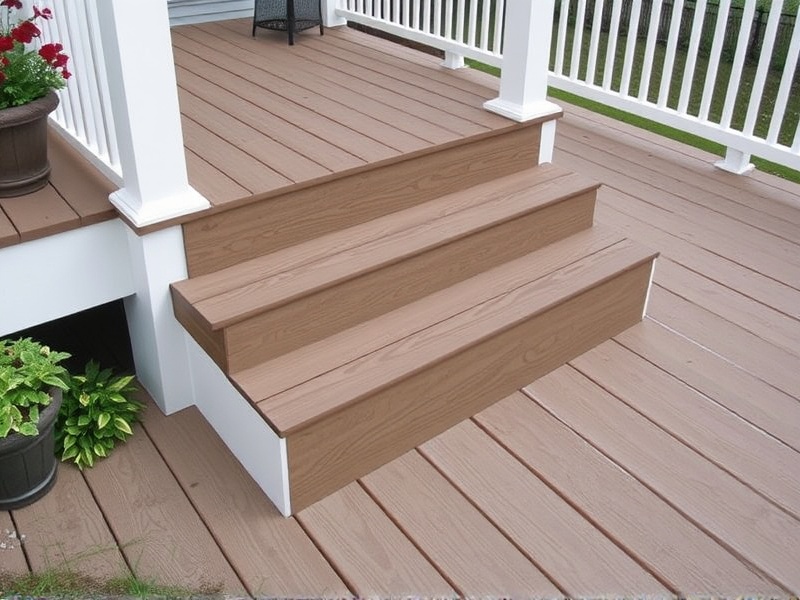
Step 4: Adding Trim Boards
Trim boards are used to cover the edges of the deck, providing a clean and finished look. Install these boards along the perimeter of the deck, attaching them with screws or adhesive, depending on the manufacturer’s recommendations. Ensure the trim boards are flush with the deck surface and securely attached.
Tips for Achieving a Professional Finish
To achieve a professional-looking composite deck, follow these tips:
- Measure twice, cut once to ensure accurate cuts.
- Use a level to check that each board is perfectly aligned.
- Apply sealant or stain to protect the composite material from UV rays and moisture.
- Regularly clean and maintain the deck to extend its lifespan.
Conclusion
Installing composite decking and trim boards is a rewarding DIY project that can enhance the functionality and aesthetics of your outdoor space. By following this comprehensive guide, you can ensure a successful installation and enjoy your new deck for years to come. Remember to take your time, use quality materials, and follow best practices for the best results.
Reviews
There are no reviews yet.